Cascade 220 Superwash from The Tangled Ball in Edgewater, CO.
Sometimes when inspiration strikes it’s not this grand idea but rather something like “I like these colors. What can I do with it?”
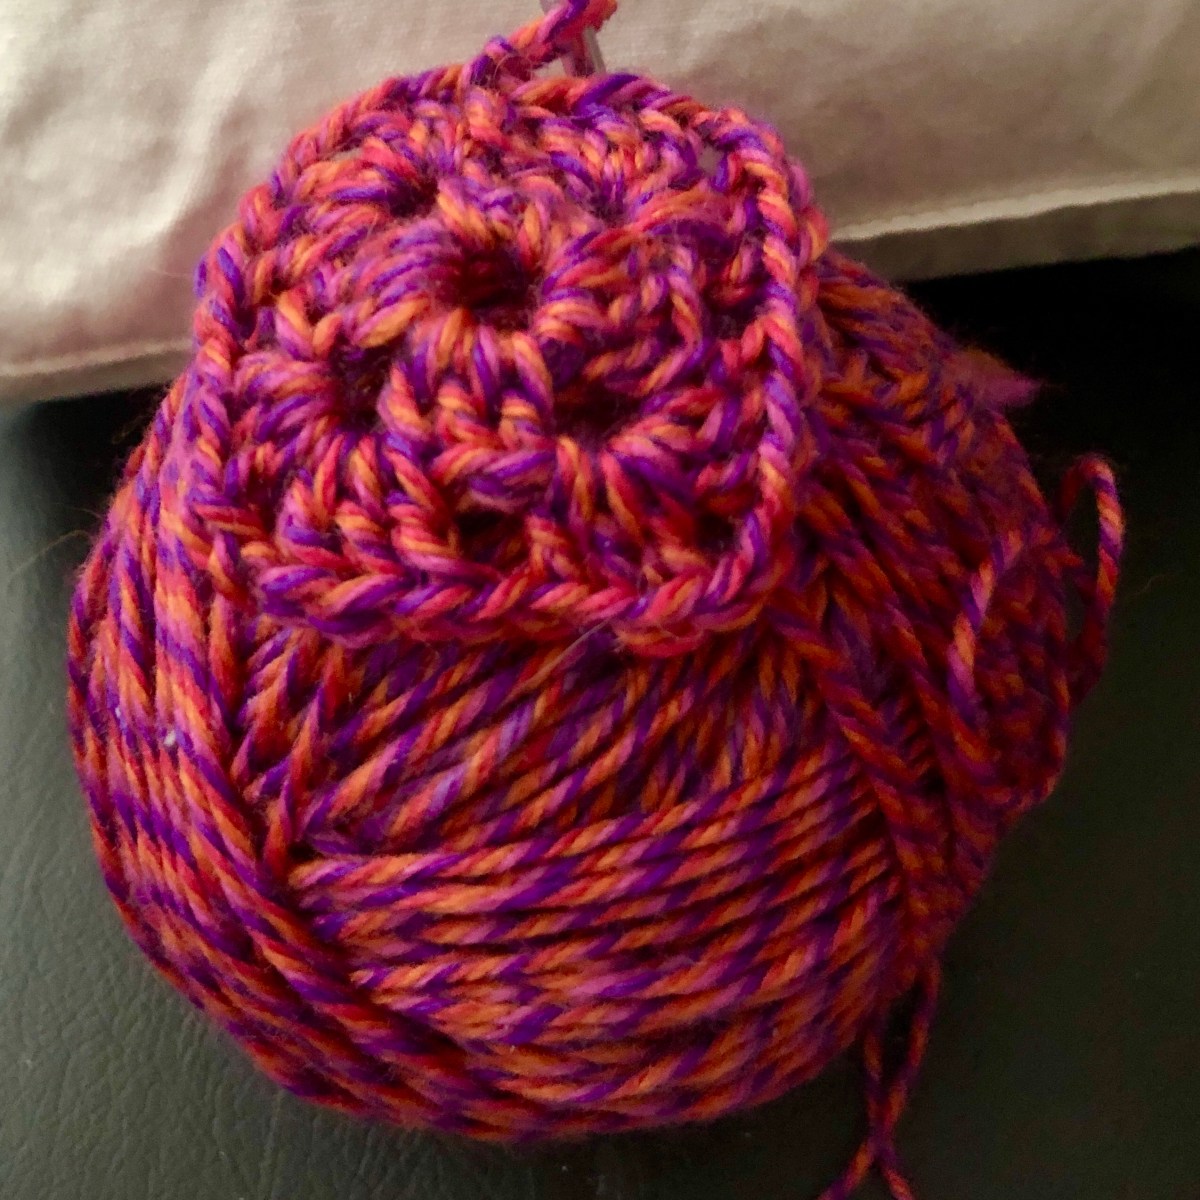
Yesterday after meeting a friend for lunch, we wandered into the local yarn store (LYS for all you yarnies out there). I keep seeing this color combo with bright pink and orange that I really want to make some drawings with but have been struggling with the exact colors. When I came across this colorway of Cascade 220 superwash that was a blend of bright pink and orange as well as some other colors, I started carrying it around like it was “my precious”.
There were some great projects for inspiration at the store but after talking with the store owner and my friend, I realized I just wanted the comfort of making the humble crocheted granny square. There is a whole stack of granny squares that I started but abandoned sitting on my bookshelf as a decoration. I decided maybe this is the time to finish up that project. It’s a chance to appreciate my new yarn and use up the random ends and balls of yarn that I have that are the same weight and fiber. As it’s a light worsted superwash, wow do I have a bunch of that! Not enough to make a project of one color but plenty of lovely colors to make a crazy blanket.
Stay tuned for how this turns out! Hopefully I’ll have an update soon rather than just a bigger stack of granny squares “decorating” my bookshelf!
Ever feel super inspired but you have other things you need to do? This is me all the time. I come up with some great ideas but my follow through sucks. I was mentioning to an art therapist how I’m trying to focus on an art project and not start on something else until I’m finished with the current project. She asked me if I have an idea book and flashed me hers. I sheepishly said “I have an idea napkin” and showed her this pitiful napkin I wrote some ideas on that has been laying here helplessly on my kitchen table.
I love this concept of an idea book and am hoping that the small act of writing down ideas helps me keep focused on current projects while still honoring inspiration. So, I went out and bought a small sketchbook and made it a sticker to declare its purpose.
Now I have a place to put all the brilliant and not so brilliant seeds that could grow into projects, a place to honor the ideas that pop into my head, and an opportunity to be more thoughtful about what I create rather than responding impulsively and never quite finishing anything!
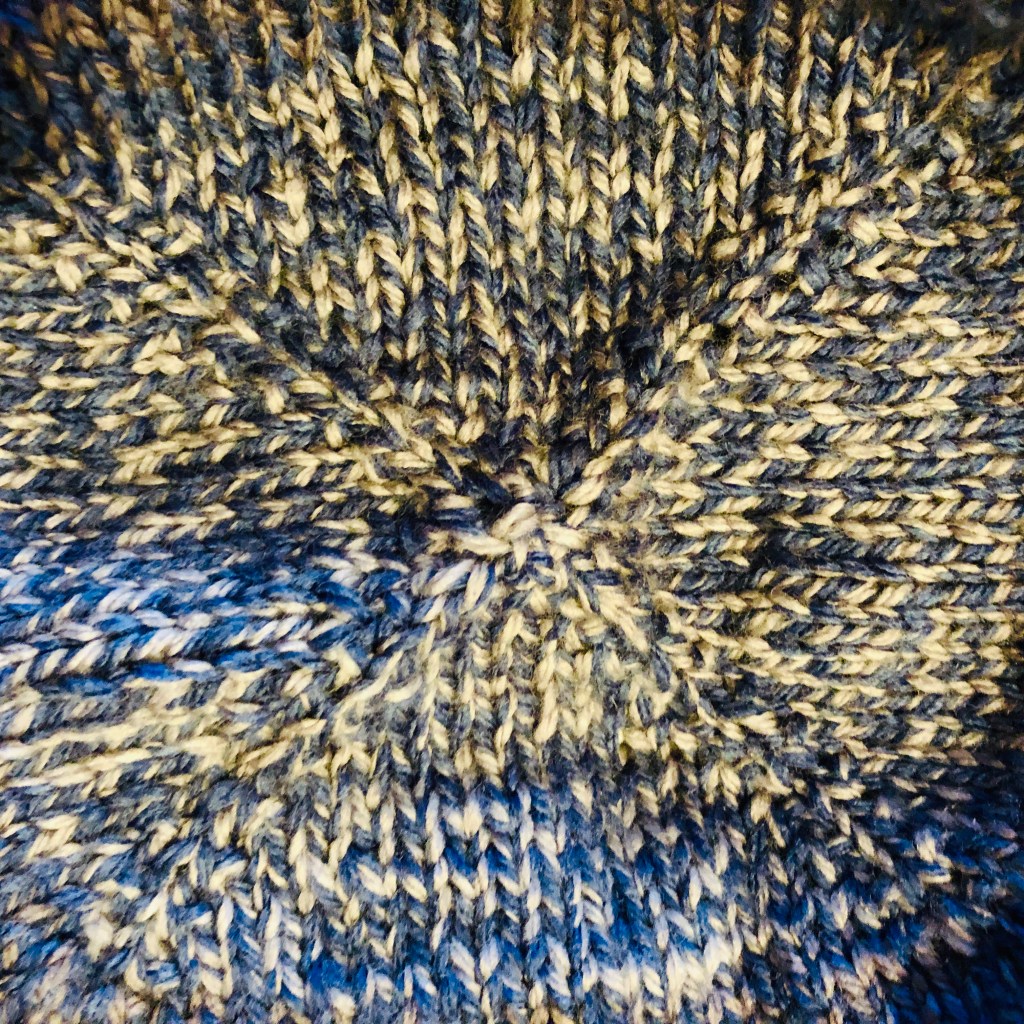
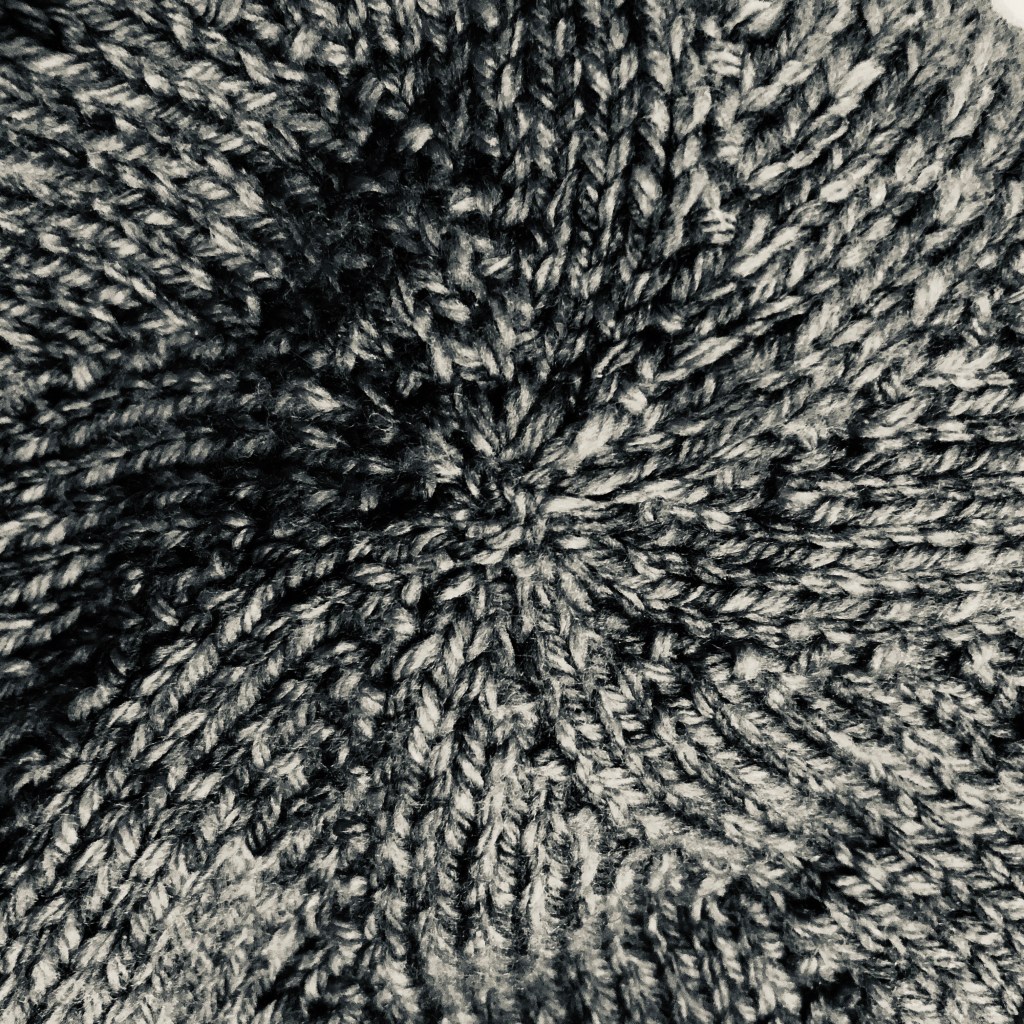
People that I knit with know I love knitting hats. While I have a deep appreciation of bigger projects and a decent skill set when it comes to knit and crochet, I have a short attention span. I like being able to knit up something quickly. My go-to lately is top-down hats. While a common construction in crochet, most knit hats are created from the brim up. I’ve come across a few knitted hat patterns that are top down but they’re more of a novelty.
Following the same recipe used by crocheters, you can make a top down knitted hat. Starting with 8 stitches in a ring, you continue by increasing 8 stitches every other row until you come to a diameter that is about a third of your desired circumference. It starts a little fiddly and I employ some tricks for placing my increases but once the increase is done, it’s smooth sailing and you’re on your way to a new hat!
The two needle choices I’ve been using to get started are either double points or magic loop. You’ll start by casting on 8 stitches and joining in the round. If you’re using double points, I would start with three needles – a working needle and two other needles with 4 stitches each. For your next round, you’ll knit every stitch. The round after will be doubling the stitches from 8 to 16. I kfb (knit front and back) every stitch to create the increases but if there’s another increase you like, go for it!
Now that you’re at 16 stitches, you’ll knit every stitch for the next round and then choose how you’ll place your increases. Unless you’re wanting to try out some specific sculptural shape (like an elf hat that droops to one side), you’ll want to have your increases evenly spaced. To do this, I’ve either placed markers ever 2 stitches splitting the stitches into 8 sections or if using double points I’ve split my stitches onto 4 needles with a fifth needle for working the stitches (alternatively, you could place markers splitting the stitches into four even sections and doing the increases as I do on dpns).
From here, you’ll continue alternating an increase row with a straight row until you’ve reached your desired size (a diameter 1/3 of the desired circumference). When I split my stitches into 8 sections, I simply make an increase either right before or after the stitch marker. Kfb is in my opinion the easiest way to increase but a yarn-over for a slightly lacy effect or a make one picking up the yarn between the stitches below and creating either a left-leaning or right-leaning increase is another option. When knitting in double points I kfb at the first and last stitch of every needle.
It’s up to you what you want to do for the body of the hat. Stockinette (knitting every stitch) is of course the easiest but if you want to add in a stitch pattern, anything in multiples of 2s, 4s or 8s should work. Just be mindful that some stitch patterns – cables for example – may tighten up the hat and make it a little snug or possibly too small. You can counter that by continuing to increase until the diameter is slightly larger than desired. Striping and colorwork are also options if you’re so inclined. For colorwork, just remember to adjust so that your design is not upside down.
Once the hat is getting close to your desired length, you’ll switch to a stitch pattern for the brim. I like a ribbed brim and usually do 1×1 or 2×2 but as with the rest of this hat recipe that decision is up to you.
Once you’ve reached your desired length, it’s time to bind off. I usually bind off in stitch pattern but again, it’s up to you. Just make sure that your bind off is loose. You can either consciously make an effort to make the stitches loose or choose to use a working needle (the needle in your right hand for most people) a size or two larger than what you’ve been using. As the needle will only have a stitch or two on it at a time, it doesn’t matter if the needle is straight, circular or double pointed.
Weave in your ends and you have a hat that’s ready to wear! Of course, if you like a pompom do add one.
This weekend I tried and failed with a few creative things but that’s part of the game, right? On Friday I swung by my favorite art supply mecca and picked up a few things – acrylic paints, a metallic watercolor pan, empty markers, fabric medium. All lovely things to settle in to a creative weekend.
Saturday I decided to try out painting on some of the tie-dyed shirts I’ve been making over the past few months. Most weekends to wrap up the weekend with a final burst of creativity I’ve been tie-dyeing a shirt or two. My intention was to make some new shirts for sleeping and morning walks. Some are great and I wear them as part of my work from home uniform with a pair of leggings. I mean what else do you wear during a pandemic? Some I’ve worn to bed because they’re alright but not my faves. Others have been neatly folded up and set aside because I wasn’t quite ready to throw them into the rotation of either sleep or WFH couture. The ones that were set aside were sorted through and I chose a few to try out as new canvases for painting. Try #1 was ok but I wasn’t happy with the way that the paint just had a mind of its own and spread. Try #2 I just lost control of what I was making because I kept swooping to fix something and just kept making things worse. Try #3 was going to be a stencil of stars with splattered gold paint sprayed into the stencil. I had no control over my dollar store spray bottle and ended up with blobs on the shirt and sprayed hands and arms. One out of three ain’t bad plus I learned a little about what I shouldn’t do.
Try #1 of acrylic paint mixed with fabric medium on a tie dye t-shirt canvas
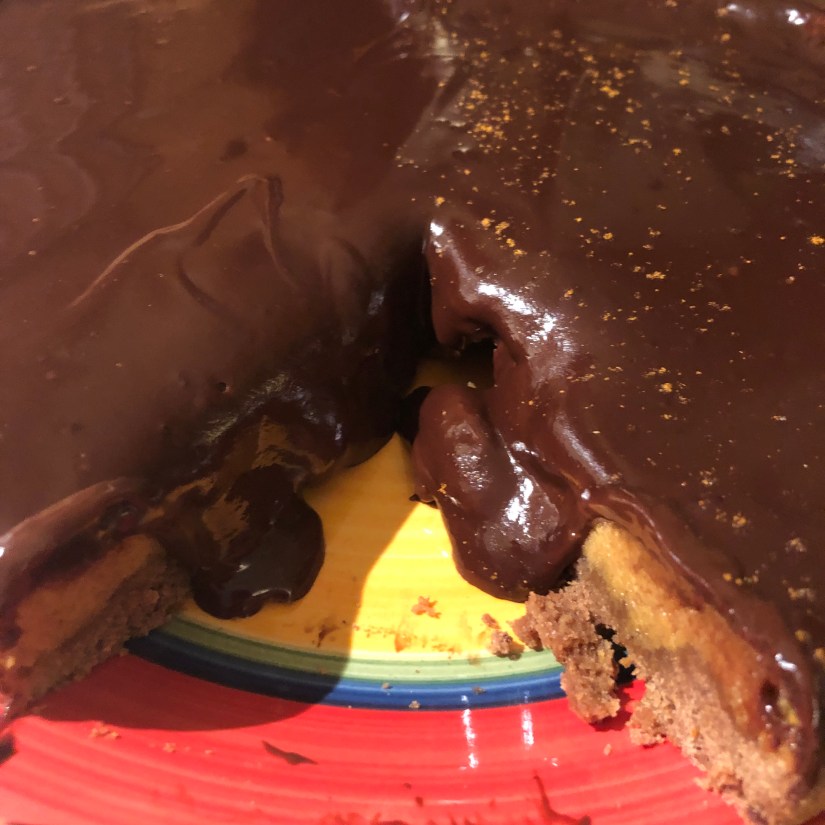
Today was the 15th annual Smorgasgourd celebration that was started by some friends back in Scranton. Some have moved to Philly and have kept up the tradition but a handful of past regulars have ended up all over the country. With this year being what it is Smorgasgourd went virtual. It was so lovely to see faces on Zoom that I haven’t seen in a bit as well as friends of friends I haven’t met before. We chatted and laughed for hours while we each ate our own gourd creations. There was pumpkin hummus, pumpkin brownies, a lemon squash loaf, raviolis, stuffed mushrooms, and other lovely creations. I decided I wanted to make a chocolate and pumpkin pie. After looking over a variety of recipes I decided to combine some ideas and make them mini. Well, as I watched the smoke billow from my oven I knew it was a fail. Fortunately, due to my lack of reading details and doing math I had some extra ingredients and adjusted to make a full size pie. My recipe here is after one test run. So, try it if you dare!
This weekend was also the new moon. I use the lunar cycle as a way to set intentions for 4 weeks at a time. On the new moon I journal, consider what’s going on in my life and what I’d like to do next. Sometimes I make some art. This time around I painted a mandala – after coming off of Julie Gibbon’s 5-day Magic Mandala Workshop it was the obvious choice. I used some Golden Fluid acrylics on the inside of a while paper grocery bag highlighting some shapes with a metallic watercolor paint. I never would have thought that watercolor came in metallic but lo and behold it sure does (this was also a takeaway from Julie’s workshop).
One more creative project for the weekend and then settling into planning for the week ahead.
On Labor Day I had the wonderful experience of going to a show at Red Rocks. A few days before, a friend generously invited me to go with her and a couple other friends. Despite living in Colorado for over a decade and going to Red Rocks for various events, I had never been there for music. We were there to see Patty Griffin and Amos Lee. While the music was incredible, I was really struck by the stories Amos told to introduce some of his songs. One of my favorite takes on life is Neil Gaiman’s speech to students graduating from University of the Arts where he implored them to “make good art” in response to whatever life throws their way. I was introduced to this speech when I was going through some significant changes in life and I appreciate this video being brought to my attention.
As Amos was about to sing some of his songs he would say how it was written in response to a person or event in his life. One of the songs he said he wrote in his 1989 Nissan Sentra. Sometimes we think we need the perfect circumstances or environment for us to create but what if we just created in response to whatever is striking us at the moment and wherever we might be? Taking that moment to feel and respond is possibly the best self-care available to us.
So, this gives me an opportunity to shout out one of my life dreams. Being a former social worker and art teacher (two separate careers), I feel it’s really important to be able to express your feelings, and all forms of art are a great, healthy avenue for this. I have this dream to be a part of or create an organization that makes learning to express yourself through the arts accessible to all. Now that I’ve said it, I guess I better find a way to work towards it!
How much of our lives is spent doing the same thing over and over? Wake up, eat breakfast, brush your teeth, yada yada. The same can be said of our creative practices. How many of us get in the routine or habit of doing things the same way – even after it no longer fits or works as well as it once did?
When I had a yarn store, I would churn out patterns. They were usually simple, beginner level and I would just give them away to sell yarn. Well, I don’t have a yarn store anymore, and it has been over three years since it has closed. I’m still knitting and making my own designs here and there but haven’t been publishing them or giving them away like I did when I had the store. It’s something I miss. For my birthday weekend, I threw together 4 of my old patterns and put them in an eBook. While doing that I came across patterns I never published and ones that I did that could use better pictures and therefore new samples. So, I guess I have my knitting work cut out for me this fall! Be on the lookout for some new patterns and revisions of the old ones!
Thanks as always for your support in my creative adventures!
People talk about practices in the world of yoga. Some people have a morning practice – their daily yoga and meditative time. Some people choose to do it in the evening. It’s basically a habit you develop with specific or more general things you do every day.
Like a lot of you, I struggle with consistency. Sometimes I have bouts of it – like the school year I ate PB&J sandwiches every day without fail or when I committed to 12,000 steps per day for over a month. My friend Amanda Gold recently published a YouTube video about working towards goals with baby steps. You don’t have to tackle some big thing at once. Sometimes it takes effort to build a practice. Sometimes it takes a challenge that someone else presents to you.
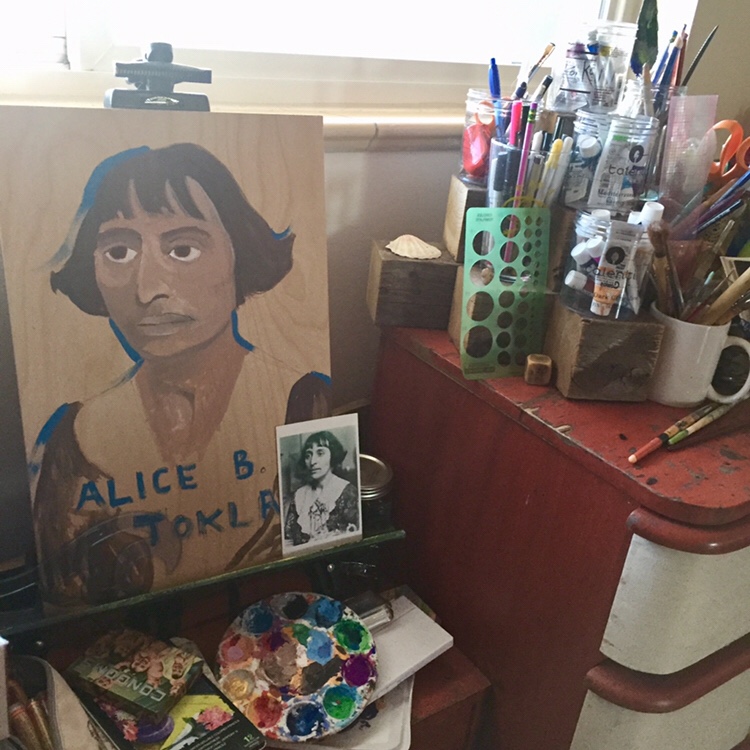
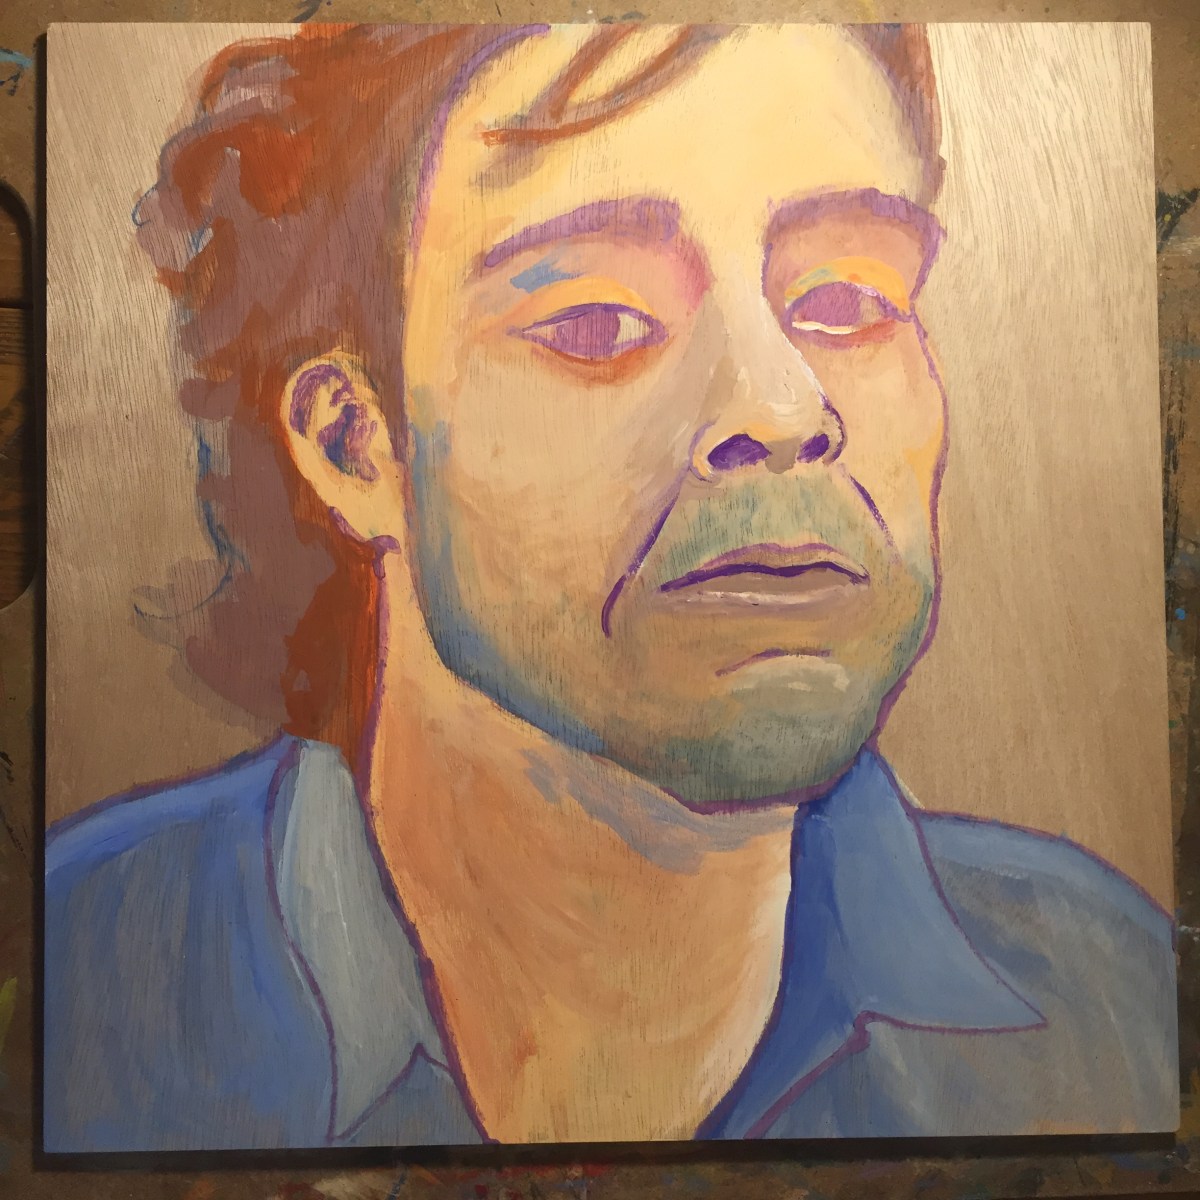
My most recent form of practice is based on an idea my friend Mystic Marni suggested – create a tarot deck based on Eudes Picard. He was a real weirdo back in the high time of occultists in the early 1900s! He outlined what should be on each card in the deck and from the perspective of 2019, it’s real weird – ghosts and roots and corn on one of the cards. At this point, I’m through the pips of the wand suit and have started the penny pips. This challenge has given me the opportunity to make a little painting daily. I do it in the morning each day before breakfast when my life is quiet and meditative.
So, what lights your fire and what practices have you created in your life – either now or in the past?
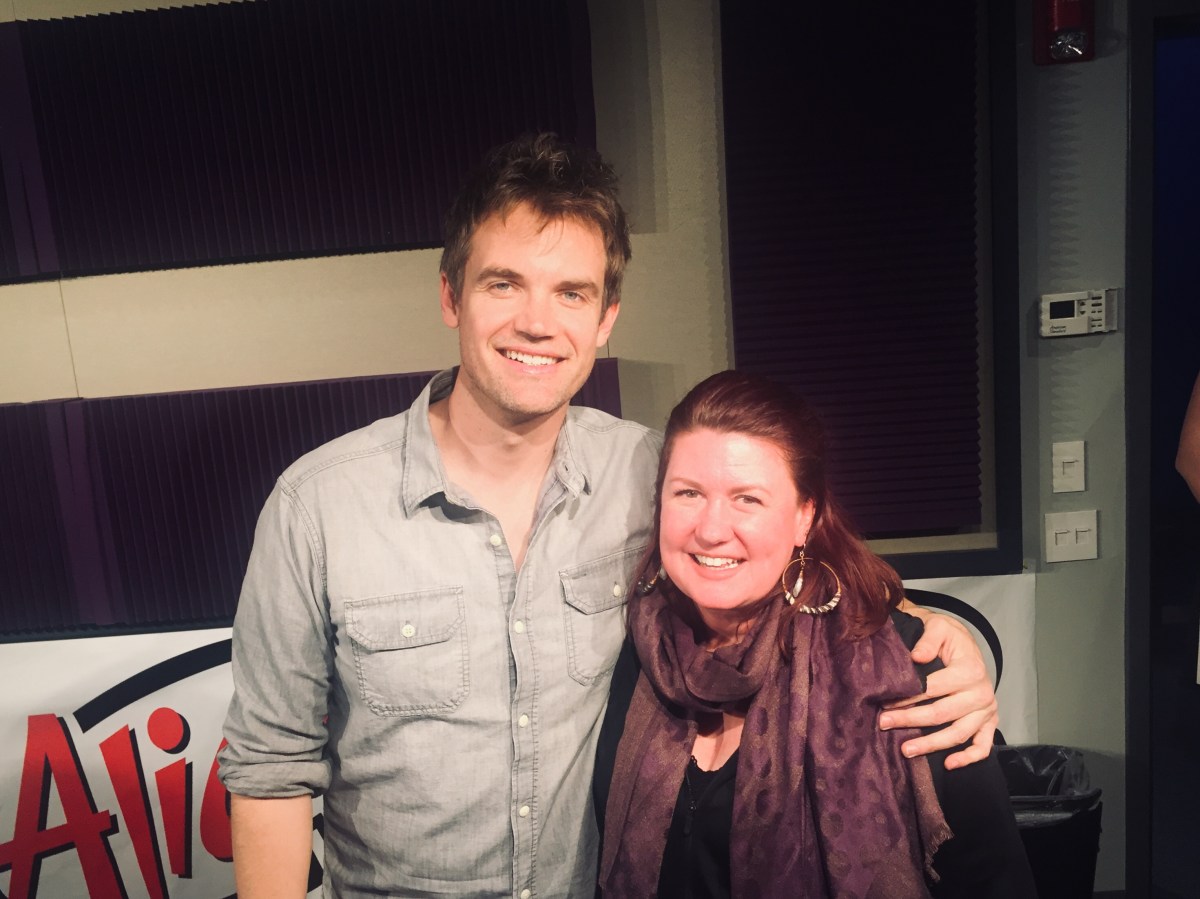
What inspires you? For me it’s new experiences, seeing things I haven’t seen before, hearing new ideas, and music. Whether it’s something you’ve heard a million times before that gives you the feels because you remember a time or place or person, or something new to you that just speaks right to your soul, music is an amazing part of life.
Yesterday I was able to have two live music experiences in one day! How lucky am I? The first was an intimate recording studio experience at Alice 105.9. To be in the small space where I was able to feel the acoustic tunes and hear stories about what inspired him made this musical experience with Tyler Hilton wonderful.
The second experience was in one of Denver’s classic event venues, The Oriental Theater. We got there late and it was packed so while I didn’t have a great view, I had a great experience. I was there with my boyfriend who agrees to try out whatever event I suggest whether it’s an artist visiting his favorite local restaurant for the 300th time (literally) or driving into the mountains to enjoy a festival celebrating a dead guy who has been on ice for years or checking out a favorite musician who is in town to play for the night. We both have fond memories of listening to Matt Nathanson at specific times in life and like his sense of humor at live shows so we were primed to have a good time. To add to that I was lucky enough to see a dear friend I haven’t seen in years.
One of my favorite musical things is hearing covers of well-known songs. Tyler Hilton treated us to a cover of a Rihanna song that’s also on his new album. Matt Nathanson sang several great covers but ended the show with one of my absolute favorites, “Romeo and Juliet”. One of my favorite versions of this song is by The Indigo Girls but Matt Nathanson did it so well!
So, whether it’s music or something else that gives you the feels and sparks your creativity, dive in today and create!
Where is your creative space? What does it look like? How does it feel?
We all have spaces in our homes and workplaces dedicated to certain activities – bedrooms, bathrooms, offices, kitchens, desks, etc. When we walk into these spaces our brains are cued as to what activities we’re supposed to do there. A dreamy bedroom makes us want to relax. A kitchen with pots and pans, appliances, and spices all ready for us to cook inspires us to make delicious dishes. A bathroom with a beautiful tub and soaps encourages us to find time to soak.
Living in a one-bedroom apartment, I don’t have a spare room for my creative activities but I have turned a part of my living space into a creative studio. It’s a space dedicated to painting and drawing. There is storage space for some of my supplies as well as a table and easel for working spaces. There’s a large window for natural light and other lighting for when I create in the evening or early morning. I try to keep it cleaned up so that I can always just settle in and create. I also make sure supplies that I use often are readily available.
Where is the space dedicated to your creative activities? What does it look like? How does it make you feel? If you thought of a dream space where you would create your masterpieces, does your creative space line up with that? If not, what could be changed to make your space more inspiring? Sometimes it is a change as small as placing all your paintbrushes or guitar picks in a cup or mug.
If you decide to post a pic of your creative space on Instagram, please tag me! @createmoreoften
Recipe for murbeteig – a northern German pie crust
A week or so prior to my trip to visit my parents for Thanksgiving, my friend Beth was winding a ball of yarn by hand at our Tuesday morning stitching group. I had been considering what to take for an activity on the he plane and remembered how somebody told me that they wound yarn on the bus as a meditative activity. So I packed an unwound skein of yarn and a knitting pattern for said yarn.
Winding the yarn by hand did prove pretty calming and helped me forget how claustrophobic the seating was on my flight. It also sparked a conversation with my neighbor for the plane ride. She is an amazing writer man named Kathrine. She moved from Germany to Manhattan in the 1960s when she was 18 and eventually moved to the Philly area after living in New York for almost 10 years. We talked about knitting, our families, houseplants, our men friends, baking and bunch of other things. The flight went by so quick with all of our conversation, and I walked away with a pie crust recipe!
My mom was so excited about the recipe that she took my journal and made a copy. I had told her that the recipe was a German recipe and she thought that her copier/scanner/printer translated it into German when she mistakenly copied my knitting pattern rather than the recipe!
My new friend Kathrine had told me how unimpressed she was with American pie crusts and that she preferred the pie crusts from her northern German childhood. If you’ve ever tried out a German recipe you’d see that it requires weighing the ingredients rather than using cups and teaspoons and such. Kathrine had been looking for an American version of this German recipe for years and eventually came across one that was easy to use and remember. She told me about different tips for the pie, like brushing egg over the crust to keep the filling from making the crust soggy and that Trader Joe’s frozen wild blueberries make a great filling.
My mom and I talked about the differences between pie crusts she’s made and this version as we were making the pies. Kathrine had given me the German name for the crust, and while the pies were baking I did some research. Apparently it’s more of a shortbread crust that can also be used for cookies and makes the pie more of a tart.
Here’s Kathrine’s recipe for Murbeteig (or Mellow Dough in English):
1 stick of unsalted butter
1 cup of white sugar
2 cups of flour
1 egg (reserve a little bit of egg white if you’d like to keep the crust from getting soggy)
Knead together all ingredients with your hands. Roll the dough flat with a rolling pin – or if you don’t have one use a wine bottle. Place the dough in the bottom of two pie pans or place half in the bottom of one and use the other half for the top. If you’d like the crust to not be soggy, brush it with the reserved egg white.
The filling is up to you. If you decide to use frozen fruit, allow it to thaw a bit and mix about 1 1/2 teaspoons of cornstarch to thicken the juice. You could also pour some maple syrup over the fruit if it needs some sweetening. My mom prefers to slice up several types of apples for a more full flavor. She also coats the apples with a little sugar, flour and cinnamon. If you don’t cover the fruit with half of the pie crust, you could combine some brown sugar, flour and butter for a crumb topping. It’s all up to you!
Bake the pie at 350F for up to 45 minutes depending on the thickness of the crust. Just keep an eye on it from about 30 minutes on. When the fruit or topping starts browning, it should be done.


 People talk about practices in the world of yoga. Some people have a morning practice – their daily yoga and meditative time. Some people choose to do it in the evening. It’s basically a habit you develop with specific or more general things you do every day.